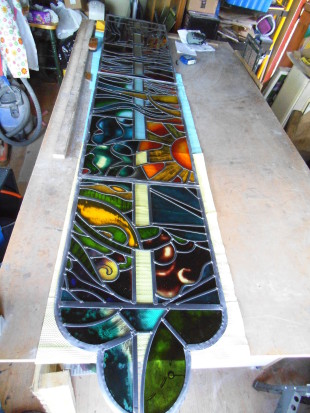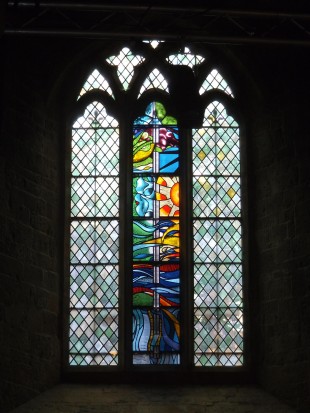
All done and dusted..!
The window was dedicated last night ( 2nd June 2015) by the Bishop of Brixworth.
I was invited to a lovely service at Holy Sepulchre that was also attended by the Bishop of Brixworth, the RC Bishop of Northampton, the Deputy High Commissioner from the Australian High Commission, the Deputy Lieutenant of Northamptonshire, the High Sheriff of Northamptonshire, the Mayor of Northampton, the principal of Caroline Chisholm school, staff and students of the school, me and members of the church and congregation. The photoshoot took a while!
Thank you to the School and Church for giving me the opportunity to have a window placed alongside such other superb examples of stained glass- including a William Morris.
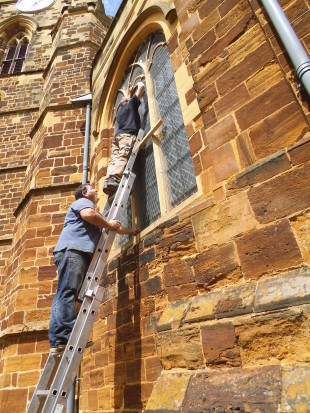
It’s in!
The new window to commemorate Caroline Chisholms life and work has now been installed in Holy Sepulchre Church Northampton, ready for the dedication service on Tuesday Evening!
I’ll save the finished image until the dedication but many thanks to my fitters, and Lucy the dog for supervising them.

A bit of publicity….!
Thank you to the National Churches Trust for giving the project a mention in their latest newsletter.
Just to clarify Holy Sepulchre is in Northampton, and the new date for the dedication ceremony is June 2nd.
I have now handed the panels to Jim, who will fit the windows hopefully very soon!
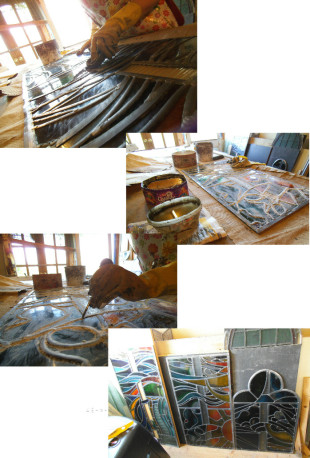
Final stages!
Having leaded and soldered the panels they are now ready for the final stages- weatherproofing them, a messy but essential part of the process!
A dyed putty mixture is brushed into all the gaps in the panels and underneath the flanges of the lead, this is then covered in whiting powder to soak up any excess moisture. The edges of the lead are then picked out and the whole panel is scrubbed to remove excess putty. The process applies to both sides and the panel is left to dry so it hardens, making the panel rigid and weatherproof.
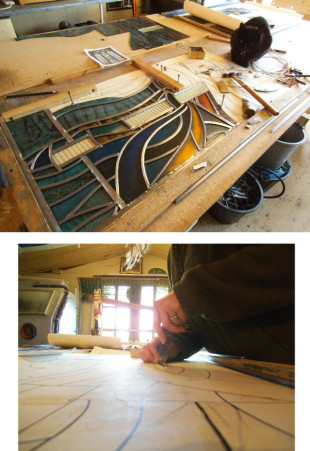
Leading up
All painting done, so it’s off to the shed to lead up.
I am using different lead sizes to add variation to the panel and to accentuate different areas.
Because of the overall size of the window it is divided up into the 3 sections that slot together vertically, so making the individual panels is quite manageable.
As you can see I am ably assisted by the workshop manager…..
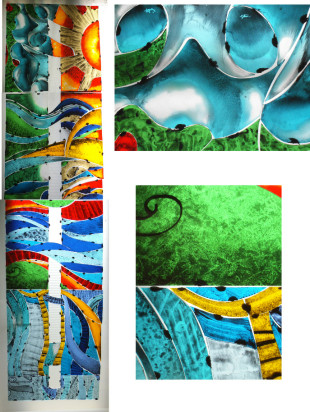
Almost there…
The recent sunny weather has made working with the kiln quite warm, but nearly finished the painting phase, just the very top to do!
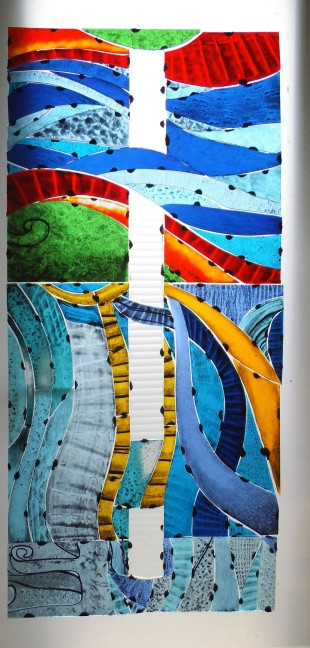
First firing finished
As the students original designs are so dynamic and energetic I decided that using different textures on each piece of glass would keep the visual dynamics of the whole panel when painted.
So, apply paint and use anything from card, bubble wrap to an ice scrapper to mark make. Only 6ft left to paint and fire…!
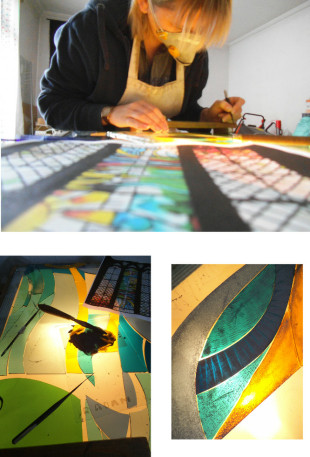
Begin the painting…
Right ho! All the glass has been sandblasted and cleaned, again, so it’s time to get the paint out.
The paint is ground glass and pigment. Mix this with various mediums from water to vinegar, glycerine, various oils etc ( not altogether though!) and you get an endless array of different ‘paint’ to apply to the glass. Generally the paint is black or brown, though you can get red for flesh and others. Use depending on what you are trying to achieve on the surface of the glass.
I have mixed up ‘best tracing black’ with water and a small amount of gum arabic, which adds adhesion, as I will mostly be applying a ‘matt’ layer of paint to the glass.
The glass pieces are cleaned and placed over a light box.
When thoroughly mixed the paint is applied to the glass with a broad brush and then manipulated to create the effect I want.
